Thursday, December 5, 2013

Homemade Lip Balm, Sugar Scrub and Body Butter

Perfectly 
Wonderful 
Party


My friends and I had a little get together and made gifts for this holiday season.  I will be gifting these to teachers and friends.  We made lip balm, sugar scrub and body butter.  All the recipes were simple and most we got from Pinterest!
_______________________________________________________________
Me applying a little lip balm on Amy's lips.  *peppermint kiss*


We did plan a few weeks ahead and purchased:


Is also purchased a few items such as cocoa butter, sweet almond oil and essential oils from www.pipingrock.com    Great prices and customer service.

Coconut oil from Costco seems to be the most economic, $15.99 for a 54 oz container.
I also found some great tapes at Hobby Lobby to put of the top with labels we printed from avery that I also purchased from amazon.
_______________________________________________________________________________

So...here is a list for the lip balm, scrub and body butter
` essential oils (whatever scents you like)
`coconut oil
`bees wax
`local honey
`shea butter
`vitamin E oil
`sweet almond oil
`lip balm containers
`8oz deli containers
`cocoa butter (smells like chocolate)

_________________________________________________________________


Lip Balm

Peppermint kiss
Coconut kiss
Orange kiss
*pouring the lip balm*

We used a recipe from the blog "food for my family"


1/2 ounce beeswax
2 teaspoons olive oil or jojoba oil
2 teaspoons coconut oil (solid at 74ยบ F)
1 teaspoon shea butter or cocoa butter
1/2 teaspoon pure aloe vera
1/4 teaspoon vitamin E oil
5-7 drops essential oil (like peppermint or grapefruit)

In a double boiler, combine the beeswax, olive oil, coconut oil, and the shea/cocoa butter. Heat over low heat just until oils and beeswax are melted. Remove from heat. Stir in aloe vera, vitamin E, and the essential oils.

Pour the mixture into small 0.15-ounce tubes. Allow to cool completely to set.


Makes (7) 0.15-ounce lip balm tubes.
Copyright © Food for My Family.


The body scrub recipe is pretty simple.  We just used raw brown sugar and or white sugar combos as the base and added honey, vitamin E and a carrier oil such as olive oil or sweet almond. Add whatever essential oil for your scent. Be creative and add what you want.  We even added orange zest to one of the scrubs and lip balms.


Tis the season for spending time with friends and making fantastic homemade gifts!

Kara making sure Amy pours it just right....


Traci sporting her "naughty" shirt for the holiday season.


Thursday, September 12, 2013

Master bath #goodbyehollywood


~Master Bath Update~
________________________

When we bought our house in 2003 I was not a huge fan of the gray tile and never a fan of the hollywood lights!  Glad to say adios to the ugly lights and hello to serenity.


BEFORE

AFTER_______________________________________

I painted my cabinets gray with a black glaze.  Now I'm ready to tackle my kitchen cabinets.  I also chose sconces for lighting in the bathroom.  Kind of an out the box light above the mirror and way cheaper.  I bought these for $20/light at home depot on clearance.  The sconces are glass, not plastic which was a huge sell for me.


Thursday, July 25, 2013

~B U F F E T~with...my favorite FREE stencil

BEFORE
This is your typical ugly dresser/buffet
Thrift store buy~ $49.99

AFTER
Painted with "aquarium" blue from sherwin williams.  Sanded the top and painted with my fav. free stencil from: The Jones Design Company  http://jonesdesigncompany.com/

I used scrapbook paper and modgepodged the outside of the drawers.


Fantastic glass knobs from hobby lobby.


This pic shows the scrap paper on the front of the drawers.


I traced the stencil, then traced the pencil lines with paint.  I then applied a gel stain mahogany, let it set for 8 min. then wiped it off.  

Winter decor

Birthday party fun!

Monday, July 1, 2013

REHAB R&R

R&R

My husband says I need to get back in school.  I have the summer off from grad school and the projects just keep coming.  Since May I have replaced all the flooring in our upstairs with hardwood (blog later), finished some furniture and rehabbed by master bath. This may sounds like a lot of work to some, but this is truly my R&R....not school!

Before
I always get started on something and forget to take good before pics.  I had already sanded the top.  Paid $20 for this piece at a garage sale.

Look really close.  I drew the flower on top with a pencil.  My inspiration was a plug-in from Bath and Body.


I painted stain on top of the wood after sanding it down.  Love the look and wish the end product would have been as bold.

 love this look


After!  
Next time I will try a different type of stain to keep the dark, bold look.  


Done!

Thursday, August 9, 2012

CHEVRON

CHEVRON WALL

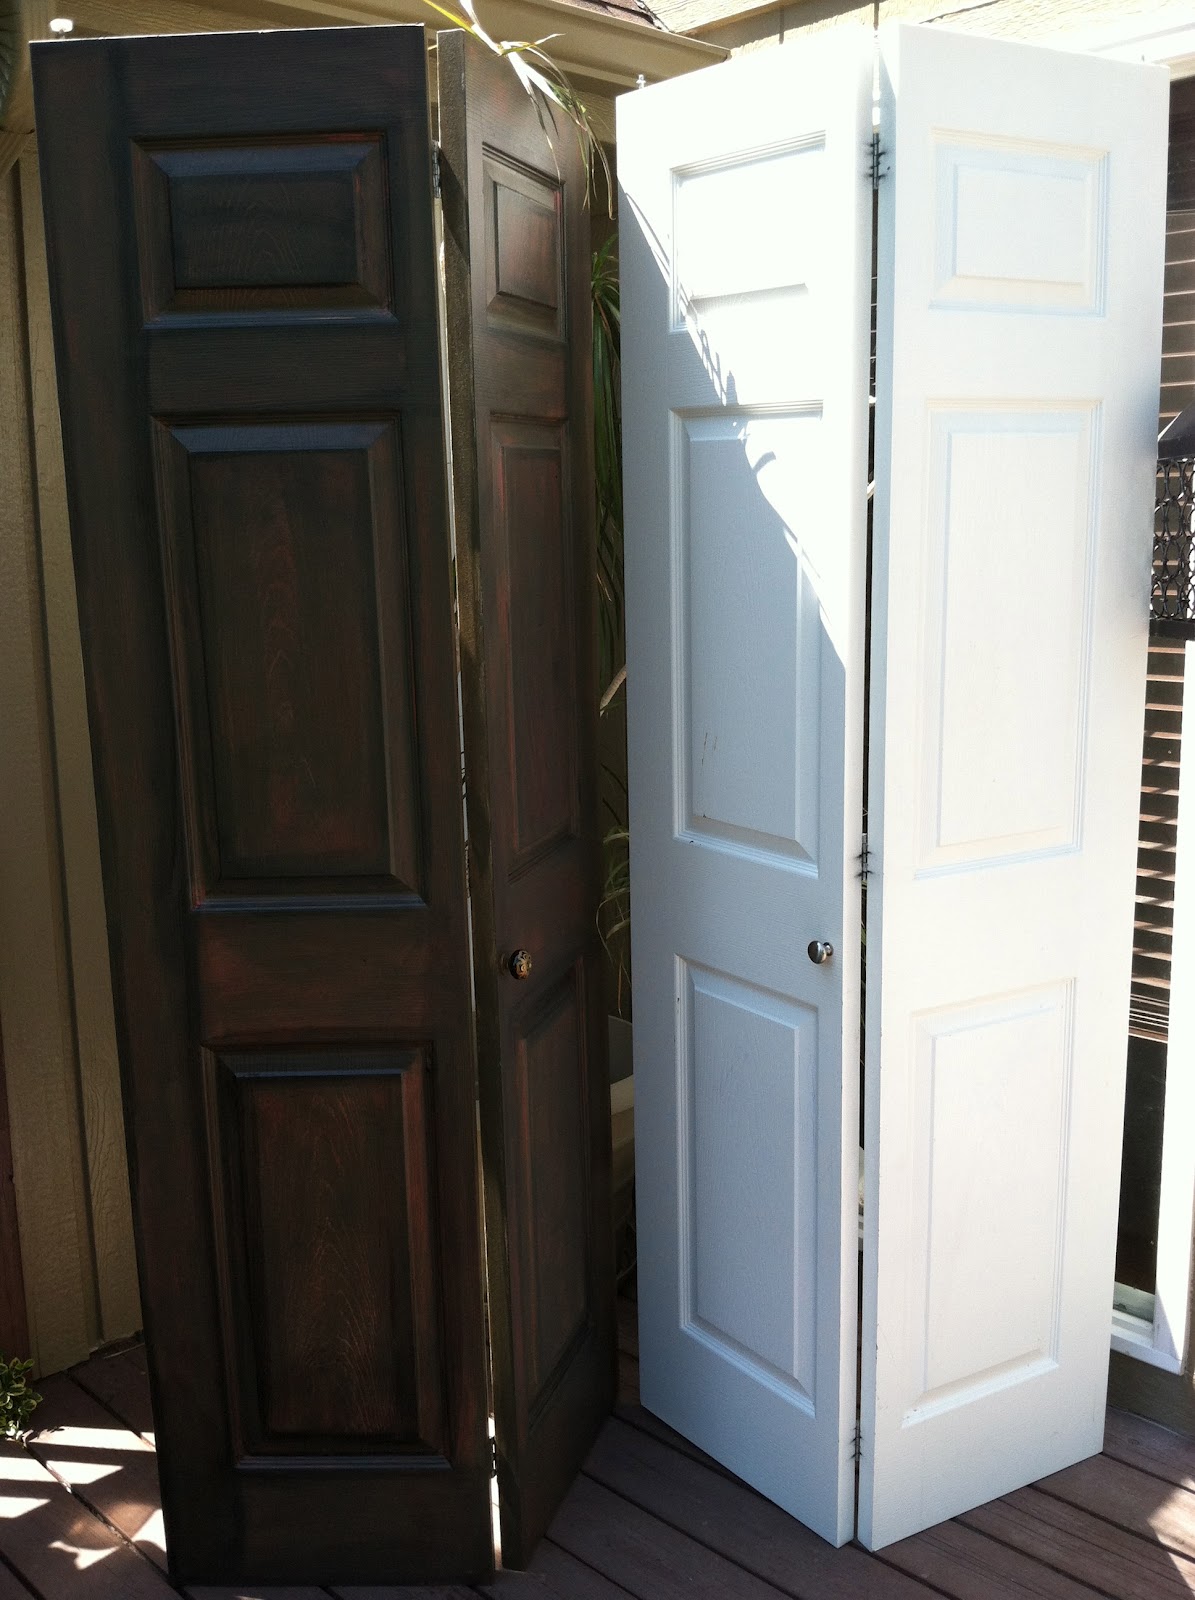
Love this look and the colors.   Painting a pattern really updated my upstairs hallway and added a little character.  Notice my faux wood doors.  I painted these doors earlier this year.


This only took about an hour since the wall was already painted a gray color.

_________________________________________________________________


Love the look of wood without paying wood prices.  

 Base coat for the faux wood doors.

 Before


 Doors side by side


Faux wood vs white


Cubby in the  upstair hall painted with a free stencil online and leftover paint from another project.  Nothing beats free!

Tuesday, May 1, 2012

B I G girl room

CHIC-CHICK
________________________________ BIG-girl ROOM 


My inspiration for this project came from my crazy obsession with Pinterest.  I found a bed on Pinterest that I absolutely loved.  So began the hunt on our local craigslist for the perfect bedroom set that somewhat resembled the look.  

This project includes:  
  • wall stenciling
  • chalk painting
  • headboard tufting


First things first...find the furniture!
______________________________________________________

I bought the bedroom set including the tall dresser, bed, side table and desk for $250 off our local Craigslist
I purchased the chair at a local thrift store for $35.  A little more than I wanted to spend, but it was in perfect condition.


A little history:  The bedroom set was originally used by the owners of Chandler's bakery in North Kansas City, I would guess in the early 20's.  Beautiful set!  Any antique dealer is going to cringe with what I have done to this set.  Paint...paint...paint...


Guess I forgot to take a pic of the desk before the painting began.


__________________________________________________________________

Chalk Paint~make it..don't buy it!

Chalk paint gives you a dull finish, but allows for the perfect shabby antiqued look. Also...NO SANDING!!!  Not to be confused with Chalk-board paint, completely different paint and concept.

You can buy already mixed chalk paint, but it is REALLY expensive, not to mention the cost of shipping.


I purchased the calcium carbonate on-line for $3.95


Satin paint~bucket to mix~calcium carbonate

Calcium carbonate acts as a bleaching agent, so keep that in mind when you are choosing colors and mixing.


____________________________________________________________________

My garage is always a mess with projects galore.  This one took the prize for now you really can't park in here!

Notice the 2 year old, probably with a can of paint and paintbrush in hand.


Tufted Headboard

I purchased peg board, layer it over the top of the headboard and free-handed the outline with sharpie.  

  • peg board~cut with jigsaw

  • space out button holes evenly and circle with sharpie
Buttons are used to pull thread through and tie to hold fabric colored buttons on the fabric side.
  • trace foam to fit on top peg board and cut with knife

  • place a lot of poly fill on top board

  • place fabric on polyfill 

  • Pull fabric and staple in place. Yes, you can staple peg board...SCORE!
  • Cover buttons with fabric ( you can buy these kits at any craft store).  Really easy to do!

  • Use upholstery thread, double thread.  Thread fabric colored buttons, pull and push buttons at the same time.  Use random buttons seen above to secure tie in place.  Tie off thread while fabric buttons are being pushed in (my hubby helped with this very tedious process).


Fits perfect..now the paint!


I used heavy duty velcro to attach the tufted piece to the headboard so I wouldn't ruin the integrity of the wood.  The heavy duty from Home Depot is a must since the craft store variety is just not strong enough.

~~~~~~~~~~~~~~~~~~~~~~~~~~~~~~~~~~~~~~~~~~~~~~~~~~~~~~~~~~~
Time to Paint~Chalk Paint
~~~~~~~~~~~~~~~~~~~~~~~

Before
 After one coat..took about 4-5


_____________________________________


After painting all of the furniture (many times) I sanded the edges and applied a bees wax.
_____________________________


~Chic new room~

Her room was previously the nursery faux painted a couple years ago.  I should take a picture of all the paint cans I have in my garage...it's really embarrassing.


Before


After


_______________________________________________

Louis XIV meets Elvis
~ zebra stenciling, zebra bedding, glitter walls, gold leafing~


I added a set of three mirrors over the bed and the turquoise wall is mixed with glitter, just enough to glimmer in the light.

zebra stencil purchased off ebay, but later found at the local craft store
~Gold craft paint over a pale blue~

__________________________________________________________________


This is one of my favorites

Thrift store frame $1.99
scrapbook paper
Free fabric sample from the fabric store cut into a "E"


Until the next project........


simple ways to update the bathroom

90's  B-A-T-H-R-O-O-M updates If I could count the number of bathrooms I have re-done.  This is my daughters bathroom. Again, we have 90...